Google+

Pages

Wednesday, December 5, 2012

Magento: How to setup multiple currency shop

To setup Multiple currencies for magento store is very easy. To do so, just follow below steps:


1. Login to admin panel of your website.
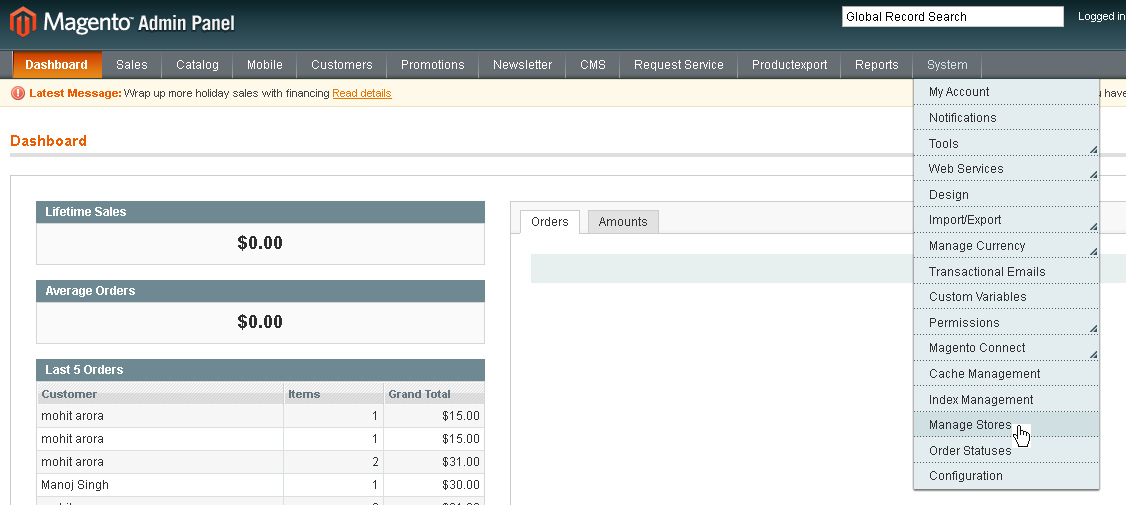
2. Go to System --> Configuration, then select Currency Setup from General tab.


        Then select values for Base currency, Default display currency and Allowed currencies and Save Config button.


Note: Press Control key of key board while selecting multiple options from Allowed Currencies section.

Magento still does not know about currency rates for newly selected currencies. To let magento know about currency interchange rates, follow step #3.

3. Go to System --> Manage Currency --> Rates.


        Just click on Import button on top right side. Now click on Save Currency Rates button.


Note: You can provide values manually also, but it is recommended to import rates from web service.

That's all.. refresh magento cache and you are done. Now on frontend prices of products can be displayed in the currencies you configured.

Magento: How To Set Up Multiple Languages in Magento


In order to configure a different language for your store, you need to follow a simple procedure:

1. First go to http://www.magentocommerce.com/translations, where you will find various language translations packs for default Magento interface.
        Download the language pack for the desired language, extract and paste the extracted files to respective places in your Magento directory.
         or
You can install it directly by searching and installing through Magento Connect.

2. Now go to Admin Panel, then go to System --> Manage Stores.


        Click on Create Store View button.
Select Store, provide appropriate value for Name and code, and select Enabled from Status dropdown. Click on Save Store View button.

3. Now go to System --> Configuration and Select Store View (which you created in step #2).
Clicking on General tab (on left side), you will see Locale Options on right side. Select installed Language from Locale dropdown. Save Config.


and you are done. Just Clear Magento Cache Storage and see reflection on frontend of you website.

Monday, December 3, 2012

Magento: Upgrading mysql setup of module


Suppose, you are working on a module, and you need to:

* Add a new table, or
* Modify current tables, or
* Insert some default data in existing table, or
* Add/ modify some attributes

In every case, either you will
1. goto core_resource table
2. delete module's entry
3. and delete current tables of module

which is a poor solution, because sometimes, you don't have direct access to database, so you can't delete/ modify data in db in that case.
There is a simple solution for this. You can do it by simply upgrading you module version and write a new mysql upgrade file.


Suppose, you have a module named Mymodule. Its version is 0.1.1. You have the mysql setup file (mysql install file) mysql4-install-0.1.1.php in Mymodule/sql/mymodule_setup folder of your module.

You don’t need to make direct changes to database. To fulfill any of the above tasks in your module,


1) First create a new mysql upgrade file inside Mymodule/sql/mymodule_setup folder.

Let us suppose that you are going to change the version of your module from 0.1.1 to 0.1.2.

The name of mysql upgrade file should be mysql4-upgrade-0.1.1-0.1.2.php

2) Write necessary sql statements in this mysql upgrade file.

3) Now, you have to change the version in config.xml in Mymodule/etc folder as well.

Change the version like 0.1.2. Which is the new version for our module.

4) Reload your site. And you are done!


Note: The upgrade format is like mysql4-upgrade-CURRENT_VERSION-UPGRADED_VERSION.php


Enjoy.. :)

Monday, October 29, 2012

Magento: How to remove parent category path from sub category url in Magento

Hi friends,

Today I would like to tell you, how you can remove parent category path from sub category url in Magento.

To do so, Go to:
app/code/core/Mage/Catalog/Model folder and copy Url.php file to override it in your local package.

Open this file (Url.php) and find the following:
         public function getCategoryRequestPath($category, $parentPath)

With in this function, find the following code:

        if (null === $parentPath) {
            $parentPath = $this->getResource()->getCategoryParentPath($category);
        }
        elseif ($parentPath == '/') {
            $parentPath = '';
        }
and comment it like this:

 //     if (null === $parentPath) {
 //         $parentPath = $this->getResource()->getCategoryParentPath($category);
 //     }
 //     elseif ($parentPath == '/') {
            $parentPath = '';
 //       }
and save the file.

Note: It should be noted that the code $parentPath = ''; in else part should not be commented.
Now login to admin panel of your site, and go to:
System->Config->Index Management and click on "select all" then select Reindex Data from the Action Dropdown, then click on submit.

That's all.. Enjoy.. :)


Tuesday, October 23, 2012

Magento: How to view Magento version

Hi friends,

Have you faced problem when you were working on a complete customized theme and you were unable to know current magento version.

Just try this solution to find current Magento version of your website:

Create file versionTest.php parallel to index.php in root folder.
Now copy and paste following code in versionTest.php:
<?php
      include_once(‘App/Mage.php’);
      Mage::app();
      echo Mage::getVersion();
?>


Now just access this file using browser. Enjoy.. :)

Magento: Difference between Mage::getSingleton() and Mage::getModel() in Magento


Hi friends,
Some people ask about the difference between Mage::getModel() and Mage::getSingleton() in Magento.
Here is the difference between these two:

Mage::getModel('module/model') will create a new instance of the model object (if such object exists in configuration)
So if we write:
Mage::getModel('catalog/product'), it will create new instance of the object product each time. So,

$p1 = Mage::getModel('catalog/product');
$p2 = Mage::getModel('catalog/product');
Then $p1 is a one instance of product and $p2 is another instance of product.

While Mage::getSingleton('catalog/product') will create reference on existing object (if object does not exist then this method will create an instance using ::getModel() and returns reference to it).
So, if
$p1 = Mage::getSingleton('catalog/product');
$p2 = Mage::getSingleton('catalog/product');
Then $p1 and $p2 both refer to the same instance of product as reference $p2.

That's all.. Cheers.. :)

Friday, August 10, 2012

Magento: Get all related products of current product

Obviously, we can get all related products of current product by calling related.phtml. But there are many cases, in which we can not call related.phtml. For example:let us assume that we are showing two or more products on a page and we may want to show small image and name of these two products at a time.

Many other situations can be there, when we may not have option, but to write custom code to get related products of currently loaded product.

For such situations, try this code:

$collection = Mage::getModel('catalog/product_link')
                    ->getCollection()
                    ->addFieldToFilter('product_id',$product_id)
                    ->addFieldToFilter('link_type_id','1');

$related_products = $collection->getData();

This will give you list of all related products of a product.

Note: Here $product_id is the id of currently loaded product.

That's all.. Cheers.. :)

COURTESY: Mr. Neeraj Gupta (My dear Friend)

Wednesday, August 8, 2012

Magento: How to get last order id

There are many ways to get last order id:
 
1.  From checkout session:

    $lastOrderId = Mage::getSingleton('checkout/session')
                   ->getLastRealOrderId();

    $orderId = Mage::getModel('sales/order')
               ->loadByIncrementId($lastOrderId)
               ->getEntityId();


Above solution will not work, if you want to get last order id in admin.
For this you can try this solution:

2.  From model:
 

$orders = Mage::getModel('sales/order')->getCollection()
     ->setOrder('increment_id','DESC')
     ->setPageSize(1)
     ->setCurPage(1);


$orderId = $orders->getFirstItem()->getEntityId();
 

But this method will not work, if there are multi store in a single magento setup. So a better solution would be:

$orders = Mage::getModel('sales/order')->getCollection()
     ->setOrder('created_at','DESC')
     ->setPageSize(1)
     ->setCurPage(1);

$orderId = $orders->getFirstItem()->getEntityId();
 
 
That's all.. Enjoy.. :) 

Thursday, August 2, 2012

Magento: Debug Layout within Controller's Action

Hi,

I found a magical code to debug layout from controller's action.

var_dump(Mage::getSingleton('core/layout')->getUpdate()->getHandles());
exit("Your Layout Path is ".__LINE__." in ".__FILE__);

Just add this code and you can debug your layout.

Enjoy.. :)

COURTESY: Mr. Ankur Singhania(My dear Friend)

Magento: Catalog Search not working in magento

If quick search is not working in your magento store, don't worry. Here is a simple solution for this problem.

1.    Login to Admin Panel.
2.    Go to System > Configuration > Catalog > Catalog Search.
3.    You will find an option there, Search Type. Just change it to Like & Full Text.

That's done.. Now just flush Magento Cache and enjoy.. :)

Note:  This solution has been tested on Magento version 1.7.0

Monday, July 30, 2012

Hide Attributes which have no value in Magento

If you don't provide a value of attribute for a product in Magento, it displays as 'No' rather than hiding that attribute. This means attributes that aren't relevant for a product will still appear confusing the user. Which is a bad impression of your website.

To hide these unnecessary attributes, do the following:


Open attribute.phtml, which is located in app/design/frontend/[your package]/[your theme]/template/catalog/product/view folder, and find code like this:


<?php foreach ($_additional as $_data): ?>
    <tr>
        <th><?php echo $this->htmlEscape($this->__($_data['label'])) ?></th>
        <td><?php echo $_helper->productAttribute($_product, $_data['value'], $_data['code']) ?></td>
    </tr>
<?php endforeach; ?>


Now replace this by:


<?php foreach ($_additional as $_data): ?>
    <?php $_attribute = $_product->getResource()->getAttribute($_data['code']);
    if (!is_null($_product->getData($_attribute->getAttributeCode())) && ((string)$_attribute->getFrontend()->getValue($_product) != ")) { ?>
        <tr>
            <th><?php echo $this->htmlEscape($this->__($_data['label'])) ?></th>
            <td><?php echo $_helper->productAttribute($_product, $_data['value'], $_data['code']) ?></td>
        </tr>
    <?php } ?>
<?php endforeach; ?>


and you are done.. enjoy.. :)


Get The Current Category in Magento


Try below code to get currently loaded product id:

$category_id = Mage::getSingleton('catalog/layer')
               ->getCurrentCategory()
               ->getId();

When you don’t have access to $this, you can use Magento registry:

$category_id Mage::registry('current_category')->getId();

Enjoy.. :)

Get Last Order ID From The Session in Magento

If you want to get last order Id from session, just use this code:


Mage::getSingleton('checkout/session')->getLastOrderId();


This will give you last order id.


That's all.. :)

Friday, July 27, 2012

Getting records between dates using addAttributeToFilter


To get records between two dates using addAttributeToFilter, use code like this:

$collection->addAttributeToFilter('start_date', array('date' => true, 'to' => $todaysDate))
    ->addAttributeToFilter('end_date', array(array(
        array('date' => true, 'from' => $todaysDate),
        array('null' => true)
    ), 'left');

Note: Where $collection is collection from your model.
Note: $todaysDate can be replaced by date of your choice.

That's all.. cheers.. :)

Tuesday, July 24, 2012

How to change the Magento Admin Panel Title?

If you want to change default title of Magento Admin, there is an easy solution:
Just open the main.xml file, which is located in app/design/adminhtml/default/default/layout folder.
Find line like below: 
<action method="setTitle" translate="title"><title>Magento Admin</title></action>
 and replace the words Magento Admin with the words you like to be in default title.

That's all.. Enjoy.. :)

Monday, July 23, 2012

FIX: Magento Contact Form Email showing HTML

Some times we face a problem with Magento contact form, where the contact email shows all the HTML code.

In order to fix this problem, try this:

Go to [Magento Root Folder]/app/locale folder, then go to your language folder (such as en_US) and place the contactemail.html file in template/email folder from base language package.


Thats all.. Enjoy.. :)

Sunday, July 22, 2012

Magento: Disable category from top menu if list is empty for that category

Hi friends,

Many times we face a problem that we add categories to our magento store, but for one or more categories, we don't have products to show customer at that time.

In that case, we may not want to show that category in top menu, as it gives a bad impression to customers that there is no product in category.

You can hide that particular category from Top Menu, if it has no product. To do this, go to:

app/code/core/Mage/Catalog/Block Folder and copy Navigation.php Override Navigation.php in your local package.

Open Navigation.php of your package and paste below code in this file:


if ($category->getIsActive()) {
    $cat = Mage::getModel('catalog/category')->load($category->getId());
    $products = Mage::getResourceModel('catalog/product_collection')->addCategoryFilter($cat);
    Mage::getSingleton('catalog/product_status')->addVisibleFilterToCollection($products);
    Mage::getSingleton('catalog/product_visibility')->addVisibleInCatalogFilterToCollection($products);
    Mage::getSingleton('cataloginventory/stock')->addInStockFilterToCollection($products);
    if(count($products)==0)
       return;
}

Save file and enjoy.. :)

Sunday, July 15, 2012

Magento: How to add Google Analytics

Google Analytics (GA) is a free service offered by Google, that allows website administrators to monitor their website's traffic.

Magento supports two types of tracking:

E-commerce Tracking: which lists the customers that made purchase on that particular store and also tells what they bought.
and
Page View Tracking: which lists the origin from which your web store visitors linked to your store.

To use Google Analytics for any of these cases, first you will need to sign-up for Google Analytics account on Google.(URL: http://www.google.com/analytics/sign_up.html)

Obviously, above step is necessary for those who don't have Google Analytics Account yet.(Otherwise you can use your existing account also)

Here you will need to add Account NameWebsite's URL and Time zone.

As soon as you fill these fields and sign up, you will be redirected to the page where you will get Tracking ID for your website.

Now copy this Tracking ID and login to your website's admin panel.

now go to System-->Configuration-->Google API.

Click on Google Analytics tab in content area.


Here you need to select Enabled to Yes, paste the Tracking ID, that you copied earlier in Account Number field.

Now save your configuration.

That's all set now.. Cheers.. :)

Wednesday, July 11, 2012

Magento Fix: Add to Cart button adds the item twice in Internet Explorer

Sometimes in Internet Explorer, when we click on "Add to Cart" button, it adds product twice in the cart. This problem can occur due to many different reasons. Some of quick checks to resolve this problem are:

Solution 1:
Go to:
app/design/frontend/default/default/template/catalog/product/view folder, and copy addtocart.phtml and paste it into app/design/frontend/[your_package]/[your_theme]/template/catalog/product/view folder.

Now find some thing like this:

onclick="productAddToCartForm.submit();"

and replace it with:

onclick="productAddToCartForm.submit(); return false;"

 
Solution 2:
Go to:

app/design/frontend/default/default/template/catalog/product/view folder, and copy addtocart.phtml and paste it into app/design/frontend/[your_package]/[your_theme]/template/catalog/product/view folder.

Now find some thing like this:

onclick="productAddToCartForm.submit();"

and replace it with:

onclick="setLocation('<?php echo $this->getAddToCartUrl($_product) ?>')"

Note:Where $_product is object, by which we are getting product information.

Hopefully, one of these will solve your problem.

Enjoy.. :)

Magento: How to add Pin it button on product pages

Hi all,

To add Pin it button on product pages, just use the following process:

Add the following code, right where you want to show the pin it button:

<a href="http://pinterest.com/pin/create/button/?url=<?php echo $this->helper('core/url')->getCurrentUrl(); ?>&media=<?php echo $productImage; ?>" class="pin-it-button" count-layout="horizontal"><img border="0" src="//assets.pinterest.com/images/PinExt.png" title="Pin It" /></a>

Note: Where $productImage is the url of product image.

Add the following code to add pinit.js once just above after the above code:

<script type="text/javascript" src="//assets.pinterest.com/js/pinit.js"></script>

Note: Remember that you have to include this line only once on whole page.

Note: horizontal can be replaced by vertical or none


That's it.. Enjoy :)

Monday, July 9, 2012

Unable to get to Magento backend after changing default website

If you've tried to change the default website other than the website which has the base URL, and now you are unable to get your website's backend. Do not worry..


Here is a simple solution to get your admin panel back.
  1. Login to your Magento MySQL database.
  2. Open the table [database_prefix]core_config_data.(e.g. mage_core_config_data)
  3. Now find row with entry:  'web/url/redirect_to_base'.
  4. Change the value from 1 to 0.
  5. Now your original admin URL should work fine.
 Try [your_website's_previous_base_url]/[admin]

Note:  Where [your_website's_previous_base_url] should be replaced by URL, which you were using as Base URL.
and [admin] should be replaced by appropriate admin trailer(which you use to get access to your admin panel)
You can now change the settings back to before the collapse.

Sunday, July 8, 2012

How to get current currency code in Magento

To get current currency code in magento, use it:

<?php echo Mage::app()->getStore()->getCurrentCurrencyCode(); ?>

That's it.. Enjoy :)

How to get currency symbol in Magento

To get currency symbol for current store:

<?php echo Mage::app()->getLocale()->currency(Mage::app()->getStore()->getCurrentCurrencyCode())->getSymbol(); ?>


or if you want to pass a certain currency code to get currency symbol, then use it:

<?php echo Mage::app()->getLocale()->currency('[CURRENCY_CODE]')->getSymbol(); ?>


Where CURRENCY_CODE should be replaced by currency code of your store:For Example:


<?php echo Mage::app()->getLocale()->currency('AUD')->getSymbol(); ?>


That's it.. Enjoy :)

Wednesday, July 4, 2012

How to call .phtml file in CMS page in magento

To call a phtml file in a cms page or cms static block:

{{block type="core/template" template="templateFolder/your_template.phtml"}}

If you know, where the block file(php file) for your phtml file resides, then you can use it as type.

Example: Suppose you want to call new.phtml file that resides in catalog/product folder, and you know that its corresponding Block file(php file) resides in Catalog/Product folder, then you can use:

{{block type="catalog/product" template="catalog/product/new.phtml"}}

Magento: How to change Admin URL Path

In general, magento admin url path looks like this:

[store_url]/admin

For security reason, you may want to change admin path. To do this:

Open app/etc/local.xml and find code like this:

<admin>
    <routers>
            <adminhtml>
                <args>
                    <frontName><![CDATA[admin]]></frontName>
                </args>
            </adminhtml>
        </routers>
</admin>
You have to change below line:
<frontName><![CDATA[admin]]></frontName>
to:
 
<frontName><![CDATA[backstore]]></frontName> 
Note: Where backstore can be replaced by the word of your choice.

Now save the file.

Clear your magento cache from System-->Cache Management
Now you are ready to use your new admin url path.

Enjoy :)

Saturday, June 23, 2012

Magento: How to call static block on phtml file in magento

To call a static block on a phtml file, there are two ways:
i.    To call it with help of  [layout_file].xml
ii.   To call it directly from .phtml file

To call static block directly from .phtml file, use following syntax:

<?php echo $this->getLayout()->createBlock('[your_block_reference]')
->setBlockId('your_block_id')->toHtml() ?>

For example: If your block is a cms block, you can call it by:

<?php echo $this->getLayout()->createBlock('cms/block')->setBlockId('my-new-block')->toHtml() ?>

or if your block is not a cms block, and it lies in some folder(say: page/html), then you can call it by:

<?php echo $this->getLayout()->createBlock(' page/html')->setBlockId('my-new-block')->toHtml() ?>

To call it with help of  [layout_file].xml, go to:
app > design > frontend > [your package] > [your theme] > layout folder and Open the file that references the page you intend to put the block into.

Find the spot in your .xml where you would like your block to appear and insert the following code:

<block type="[your_block_reference]" name="[your_block_identifier]">
  <action method="setBlockId"><block_id> [your_block_identifier] </block_id></action>
</block>

For example:

If your block file lies in some folder(say: page/html), then you can call it by:

<block type="page/html" name="[your_block_identifier]">
  <action method="setBlockId"><block_id>page/html</block_id></action>
</block>

That's all in this section.. Enjoy.. :)


Friday, June 22, 2012

How to disable user registration in Magento

There are many situations, when we don't want to allow new users to checkout on our website. In such situations, the question arises, how to remove/ disable registration process from front-end. Try below procedure to do this:

i.      Add app\etc\modules\ Mycode_All.xml

       <?xml version="1.0"?>
       <config>
           <modules>
       <Mycode_Registrationremove>
                   <active>true</active>
   <codePool>local</codePool>
       </Mycode_Registrationremove>
   </modules>
       </config>

 ii.     Then create following folder structure:
        app/code/local/Mycode/etc
        app/code/local/Mycode/Helper
        app/code/local/Mycode/controllers

In app/code/local/Mycode/etc folder, create a new file named config.xml:
Paste below code in it

<?xml version="1.0"?>
<config>
  <modules>
    <Mycode_Registrationremove>
      <version>0.1.0</version>
    </Mycode_Registrationremove>
  </modules>
  <global>
    <rewrite>
      <mycode_registrationremove_account_create>
        <from><![CDATA[#^/customer/account/create$#]]></from>
        <to>/registrationremove/account/create</to>
      </mycode_registrationremove_account_create>
      <mycode_registrationremove_account_createPost>
        <from><![CDATA[#^/customer/account/create/$#]]></from>
        <to>/registrationremove/account/create</to>
      </mycode_registrationremove_account_createPost>
    </rewrite>
  </global>
  <frontend>
    <routers>
      <registrationremove>
        <use>standard</use>
          <args>
            <module>Mycode_Registrationremove</module>
            <frontName>registrationremove</frontName>
          </args>
      </registrationremove>
    </routers>
  </frontend>
</config>
Now create a new file (Data.php) in app/code/local/Mycode/Helper 
folder, and paste below code in it:

<?php 
class Mycode_Registrationremove_Helper_Data extends Mage_Core_Helper_Abstract
{
} ?>
Now create a new file (AccountController.php) in
app/code/local/Mycode/controllers folder:
and paste below code in it:
<?php 
require_once 'Mage/Customer/controllers/AccountController.php';

class Mycode_Registrationremove_AccountController extends
Mage_Customer_AccountController
{
    public function createAction()
    {
      $this->_redirect('*/*');
    }
} ?>


That's all..
It will disable registration process from your website, and when some one will try to go to User Registration page, he/ she will be re-directed to Login page.

But still some things to remove it from every where from your site.
There are two places where you can see button or radio button for 
user registration, which mislead a user that user registration is 
possible.

These two places are:

Login page: Here you see a button named Register

On onepage checkout page: Here you can see a radio button with 
label Register.

You need to hide or remove these also, to completely remove the 
registration process. To do this, go to:

app/design/frontend/[package]/[theme]/template/persistent/checkout/onepage/login.phtml


and comment out following code:

<div class="col-1">
  <h3><?php if( $this->getQuote()->isAllowedGuestCheckout() ): ?>
<?php echo $this->__('Checkout as a Guest or Register') ?>
<?php else: ?>
<?php echo $this->__('Register to Create an Account') ?>
<?php endif; ?>
  </h3>
  <?php if( $this->getQuote()->isAllowedGuestCheckout() ): ?>
    <p>
      <?php echo $this->__('Register with us for future convenience:') ?>
    </p>
  <?php else: ?>
    <p>
      <strong><?php echo $this->__('Register and save time!') ?></strong>
      <br />
      <?php echo $this->__('Register with us for future convenience:') ?>
    </p>
    <ul>
      <li><?php echo $this->__('Fast and easy check out') ?></li>
      <li>
<?php echo $this->__('Easy access to your order history and status')?>
      </li>
    </ul>
  <?php endif; ?>
  <?php if( $this->getQuote()->isAllowedGuestCheckout() ): ?>
   <ul class="form-list">
     <?php if( $this->getQuote()->isAllowedGuestCheckout() ): ?>
       <li class="control">
        <input type="radio" name="checkout_method" id="login:guest" value="guest"<?php if($this->getQuote()->getCheckoutMethod()==Mage_Checkout_Model_Type_Onepage::METHOD_GUEST): ?> checked="checked"<?php endif; ?> class="radio" />
<label for="login:guest"><?php echo $this->__('Checkout as Guest') ?></label>
       </li>
     <?php endif; ?>
     <li class="control">
       <input type="radio" name="checkout_method" id="login:register" value="register"<?php if($this->getQuote()->getCheckoutMethod()==Mage_Checkout_Model_Type_Onepage::METHOD_REGISTER || !$this->getQuote()->isAllowedGuestCheckout()): ?> checked="checked"<?php endif ?> class="radio" /><label for="login:register"><?php echo $this->__('Register') ?></label>
     </li>
   </ul>
   <h4><?php echo $this->__('Register and save time!') ?></h4>
     <p><?php echo $this->__('Register with us for future convenience:') ?></p>
       <ul class="ul">
         <li><?php echo $this->__('Fast and easy check out') ?></li>
         <li><?php echo $this->__('Easy access to your order history and status') ?></li>
       </ul>
  <?php else: ?>
    <input type="hidden" name="checkout_method" id="login:register" value="register" checked="checked" />
  <?php endif; ?>
</div>

and

<div class="col-1">
  <div class="buttons-set">
    <p class="required">&nbsp;</p>
      <?php if ($this->getQuote()->isAllowedGuestCheckout()): ?>
        <button id="onepage-guest-register-button" type="button" class="button" onclick="checkout.setMethod();">
            <span><span><?php echo $this->__('Continue') ?></span></span>
        </button>
      <?php else: ?>
        <form action="<?php echo $this->getUrl('persistent/index/saveMethod'); ?>">
          <button id="onepage-guest-register-button" type="submit" class="button">
            <span><span><?php echo $this->__('Register') ?></span></span>
          </button>
        </form>
      <?php endif; ?>
  </div>
</div>

Now go to app/design/frontend/[package]/[theme]/template/persistent/customer/form/login.phtml

and comment out following lines:
<div class="col-1 new-users">
    <div class="content">
        <h2><?php echo $this->__('New Customers') ?></h2>
          <p><?php echo $this->__('By creating an account with our store, you will be able to move through the checkout process faster, store multiple shipping addresses, view and track your orders in your account and more.') ?></p>
    </div>
</div>

and

<div class="col-1 new-users">
    <div class="buttons-set">
        <button type="button" title="<?php echo $this->__('Create an Account') ?>" class="button" onclick="window.location='<?php echo Mage::helper('persistent')->getCreateAccountUrl($this->getCreateAccountUrl()) ?>';"><span><span><?php echo $this->__('Create an Account') ?></span></span></button>
   </div>
</div>

That's all.. It will disable user registration from your website.


Magento: Transactional Email Template Preview Showing HTML code

In some magento installations(like: Magento 1.6.1, Magento 1.6.2 etc), when we try to see preview of any transactional email template, it shows html only.
 To fix this problem, here is an easy fix :
Go to:
  app/code/core/Mage/Adminhtml/Block/System/Email/Template
and copy preview.php, and override it in your local folder.
Find:
$template->setTemplateText(
$this->escapeHtml($template->getTemplateText())

);

and comment out these three lines, like below:

//$template->setTemplateText(
//$this->escapeHtml($template->getTemplateText())
//);

That's all..
Now clear your Magento's Cache and enjoy.. :)

Magento: How to delete test orders in magento

To delete test order from magento:
  1. Login to Admin Panel and go to Sales-->Orders.
  2. Note down your test order ids, for example: 100000001,100000002,100000003,100000111,100000112,100000199
  3. Now create a php file in magento root directory and name it: deleteOrders.php
  4. Now copy below code and paste it in your file:


    <?php
    require 'app/Mage.php';
    Mage::app('admin')->setUseSessionInUrl(false);                                                                                                                 //replace your own orders numbers here:
    $test_order_ids
    =array(
     
    '100000001',
     
    '100000002',
     
    '100000003',
     
    '100000109',
     
    '100000112',
     
    '100000134'
    );
    foreach($test_order_ids as $id){
       
    try{
           
    Mage::getModel('sales/order')->loadByIncrementId($id)->delete();
            echo
    "order #".$id." is removed".PHP_EOL;
       
    }catch(Exception $e){
            echo
    "order #".$id." could not be remvoved: ".$e->getMessage().PHP_EOL;
       
    }
    }
    echo
    "complete."
     ?>
     
  5. Now go to your browsers address bar and run file from here like:
    [Your_Magento_Base_URL] /deleteOrders.php


  6. At the end, delete deleteOrders.php.

    That's All.. Cheers :)